Page 240 - Schut Catalog
P. 240
www.prenar.ee GAUGE BLOCKS
Gauge blocks general
Which gauge block is the most suitable for you?
MATERIALS Class 2
Steel Class 2 gauge blocks are intended for general workshop
Steel is the oldest material and remains the most commonly use by skilled workers to set up, for example, measuring
accepted for gauge blocks. If well taken care of, steel gauges instruments.
guarantee many years of useful life. They must be cleaned Class 1
carefully before and after use and stored in a protective case in
a dry environment. Class 1 gauge blocks are used as working standards in
Tungsten carbide inspection rooms within the production to set and calibrate
measuring instruments and equipment as well as to inspect
When a higher degree of hardness is needed, tungsten tools, fixtures and machines.
carbide is the material to choose. It is less sensitive to wear Class 0
and damage compared to hardened steel. Especially when
used frequently, tungsten carbide has an increased life span Class 0 gauge blocks, with their high accuracy, are intended
compared to steel gauge blocks. for use by measuring technicians in environmentally controlled
Ceramics inspection rooms, for example to calibrate measuring
equipments.
Ceramics is relatively wear resistant and has a high degree Class K
of strength and stability. It will not rust and is unaffected by
chemicals. Class K gauge blocks have the highest class of accuracy.
They are the length standards in a calibration laboratory and
ACCURACY CLASSES other calibration values are derived from these gauges. Only
Gauge blocks are classified in upgrading order of accuracy with a UKAS certificate – or with another certificate, accepted
according EN ISO 3650: 1998 in the classes: 2, 1, 0, K. The by UKAS as equivalent (e.g. DAkkS, RvA and COFRAC)
ISO 3650 is an international standard, which is adopted by – will these gauge blocks be at their best. The most accurate
national standards such as RvA, DAkkS, UKAS, BKO, SCS gauges can meet a tolerance of ± 0.05 µm.
and COFRAC.
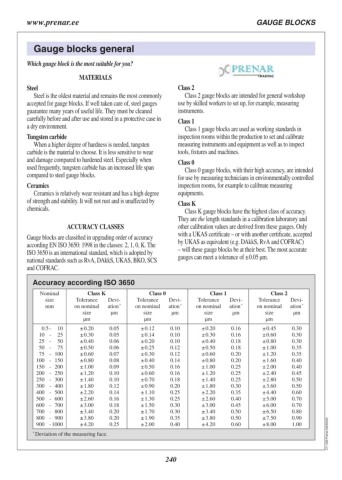
Accuracy according ISO 3650
Nominal Class K Class 0 Class 1 Class 2
size
mm Tolerance Devi- Tolerance Devi- Tolerance Devi- Tolerance Devi-
0.5 - 10 on nominal ation * on nominal ation * on nominal ation * on nominal ation *
10 - 25
25 - 50 size µm size µm size µm size µm
50 - 75
75 - 100 µm µm µm µm
100 - 150
150 - 200 ± 0.20 0.05 ± 0.12 0.10 ± 0.20 0.16 ± 0.45 0.30 C11.202.Prenar.20240422
200 - 250 ± 0.30 0.05 ± 0.14 0.10 ± 0.30 0.16 ± 0.60 0.30
250 - 300 ± 0.40 0.06 ± 0.20 0.10 ± 0.40 0.18 ± 0.80 0.30
300 - 400 ± 0.50 0.06 ± 0.25 0.12 ± 0.50 0.18 ± 1.00 0.35
400 - 500 ± 0.60 0.07 ± 0.30 0.12 ± 0.60 0.20 ± 1.20 0.35
500 - 600 ± 0.80 0.08 ± 0.40 0.14 ± 0.80 0.20 ± 1.60 0.40
600 - 700 ± 1.00 0.09 ± 0.50 0.16 ± 1.00 0.25 ± 2.00 0.40
700 - 800 ± 1.20 0.10 ± 0.60 0.16 ± 1.20 0.25 ± 2.40 0.45
800 - 900 ± 1.40 0.10 ± 0.70 0.18 ± 1.40 0.25 ± 2.80 0.50
900 - 1000 ± 1.80 0.12 ± 0.90 0.20 ± 1.80 0.30 ± 3.60 0.50
± 2.20 0.14 ± 1.10 0.25 ± 2.20 0.35 ± 4.40 0.60
± 2.60 0.16 ± 1.30 0.25 ± 2.60 0.40 ± 5.00 0.70
± 3.00 0.18 ± 1.50 0.30 ± 3.00 0.45 ± 6.00 0.70
± 3.40 0.20 ± 1.70 0.30 ± 3.40 0.50 ± 6.50 0.80
± 3.80 0.20 ± 1.90 0.35 ± 3.80 0.50 ± 7.50 0.90
± 4.20 0.25 ± 2.00 0.40 ± 4.20 0.60 ± 8.00 1.00
* Deviation of the measuring face.
240

